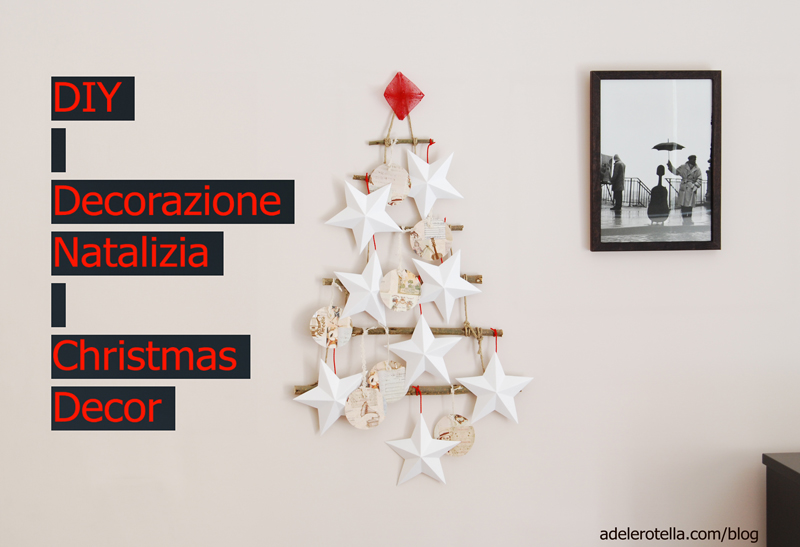
Questa settimana ho dedicato il mio tempo libero alla creazione di questa semplice decorazione natalizia che appenderò alla mia porta l’8 dicembre, per dire benvenuto agli ospiti e alle imminenti giornate festive!
A partire da questa immagine, la mia fonte di ispirazione, ho creato il mio personale albero decorativo in poche mosse e spendendo pochissimo!
OCCORRENTE
- rami di diverse dimensioni
- spago
- cartoncino
- carta da regalo
- tessuto rosso
- nastrini, passamanerie, ecc.
- cesoie, forbici, colla, nastro adesivo, spillatrice, ago e filo
PROCEDIMENTO
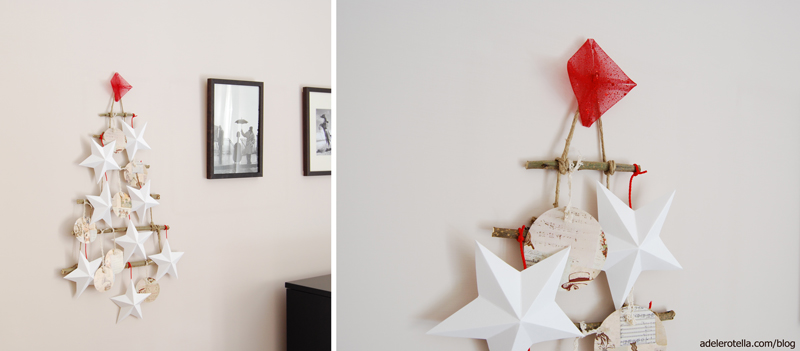
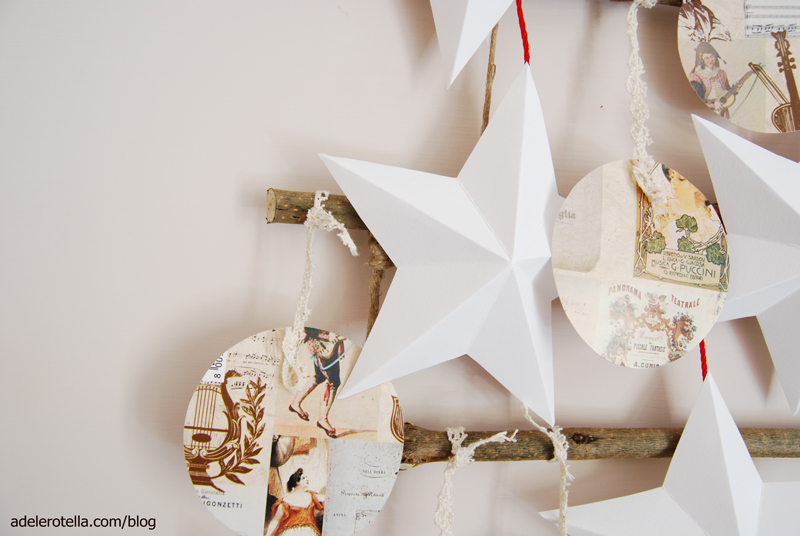
1. la base: ho disegnato il mio albero su un foglio, ho appoggiato sopra i rami a una distanza di circa 8 cm l’uno dall’altro, ho regolato le lunghezze con delle cesoie. Ho legato i rami a due a due con dello spago.
2. le stelle: ho seguito questo tutorial di TeddyFactotum.
3. le sfere: ho incollato della carta da regalo a del cartoncino, ho disegnato delle sfere e le ho ritagliate.
4. la punta: ho ritagliato un quadrato dal mio tessuto rosso, ho ripiegato gli spigoli verso il centro e li ho fissati con ago e filo.
5. il lavoro finito: ho cucito la punta di tessuto allo spago. Ho attaccato il filo rosso dietro alle stelle con del nastro adesivo e ho attaccato la passamaneria alle sfere con una spillatrice. Ho legato stelle e sfere ai rami.

This week I spent my free time creating this simple Christmas decoration that I’m going to hang on my door on 8th December, to welcome my guests and the upcoming holydays!
Starting from my inspiration (this pic), I made my personal decorative tree in a few steps and saving money!
STUFF
- branches of different sizes
- string
- cardboard
- wrapping paper
- red fabric
- ribbons, trimmings, etc.
- Shears, scissors, glue, tape, stapler, needle and thread
HOW TO
1. the base: I designed my tree on a page, I placed the branches on at a distance of 8 cm each other, I adjusted lengths with shears. I tied branches in pairs with string.
2. the stars: I followed this tutorial by TeddyFactotum.
3. the spheres: I glued wrapping paper on the cardboard, I drew the balls and I cut them.
4. the tip: I cut a square from my red fabric, I folded the edges to the center that I fixed with needle and thread.
5. the finished work: I sewed the tip to the string. I attached a red ribbon behind the stars with tape and I stapled the trimmings to the balls. I tied stars and balls to the branches.
Links:
http://homebylinn.blogspot.fr/2013/12/a-d-v-e-n-t-s-k-l-e-n-d-e-r.html
Pingback: DIY Christmas Tree Wall Decor
Pingback: Christmas Door Decorations Start The Winter Celebrations Early - Home Decor & Crafts
Pingback: Colorful Wall Arts | Home Designing